 blog
How to Choose Lighting Equipment for Property Photos
Last Updated: October 27, 2026
Quick Summary
The best lighting equipment for real estate photography is a two- or three-flash battery-powered kit with light stands, modifiers, a radio trigger and spare batteries, typically costing £400 to £800. Aim flashes at ceilings or pale walls to fill rooms naturally rather than lighting the camera directly.
- A workable two-light kit fits in one shoulder bag and sets up in under five minutes.
- Choose flashes with a guide number of around 36-60 and power adjustable down to 1/128.
- Aluminium stands around 2.4 m tall are the practical sweet spot for property work.
- LED panels suit video walkthroughs but usually lack the power to balance bright windows.
- Skip studio strobes, C-stands, gels and light meters for residential property shoots.
Table of Contents
- Why Lighting Equipment Decides Your Listing Photos
- What Belongs in a Real Estate Photography Lighting Kit
- How to Light a Room for Real Estate Photography
- Natural Light vs Flash for Property Photography
- Finding the Best Flash for Real Estate Photography
- Red Flags vs Cosmetic Issues: What Lighting Cannot Fix
- Book a Photographer Who Brings the Right Kit
- Frequently Asked Questions
Why Lighting Equipment Decides Your Listing Photos
Walk into an empty room at midday and it can look flat, grey and smaller than it really is. The same room, lit deliberately, reads warm, spacious and worth a viewing.
At Property Home Photos, we provide professional property photography for homes, holiday lets and commercial spaces. Lighting equipment is the set of portable lights, stands, modifiers and controls a photographer uses to lift a room's brightness and balance it against the windows. Good kit does not make a room look artificial; it makes it look the way a viewer imagines it should.
Below, we break down what can belong in a kit and how to use it.
What Belongs in a Real Estate Photography Lighting Kit
A practical real estate photography lighting kit is smaller than most people assume. You need enough firepower to lift a dark corner and enough control to keep the result looking natural, not a studio's worth of gear. The exact contents depend on whether you are shooting stills, video walkthroughs, or both, but the core stills kit below covers the vast majority of residential properties.
guidance on safe use of portable electrical equipment at work
The Core Stills Kit: What to Buy and Why
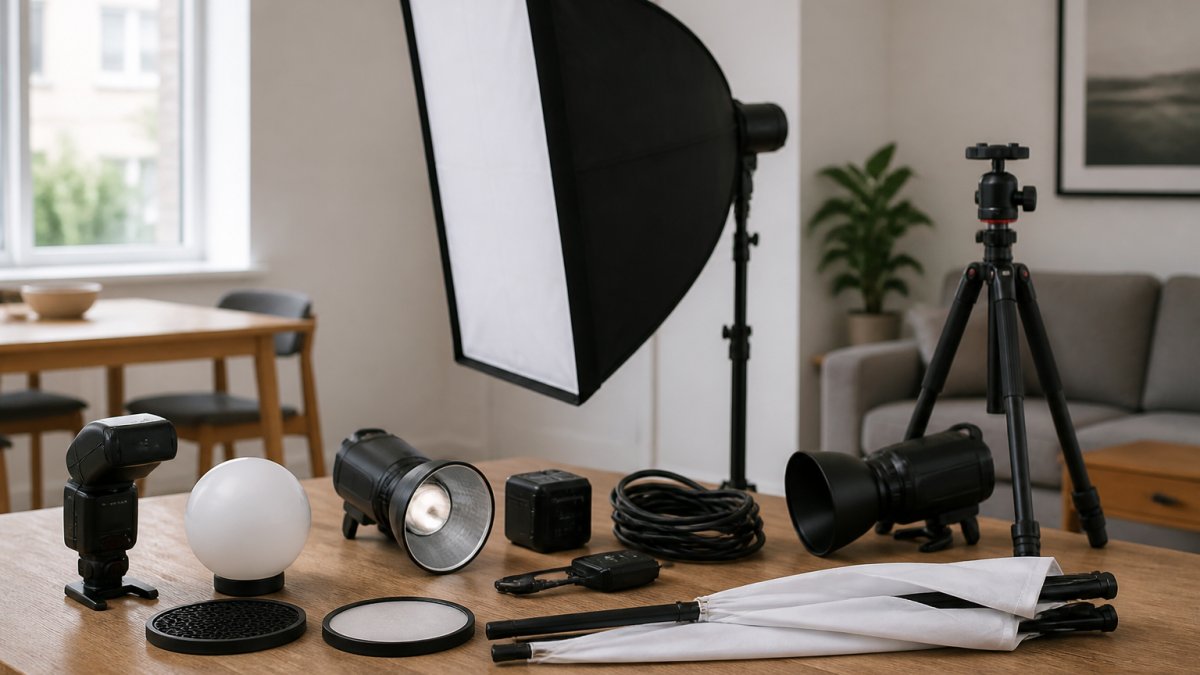
A workable two-light kit for property stills typically includes:
- Two or three battery-powered flashes. A guide number of around 36-60 (metres at ISO 100) is enough for most rooms when you bounce light off a ceiling or wall. Units with adjustable power down to 1/128 let you fine-tune fill without moving stands.
- Two or three light stands. Aluminium stands with a maximum height of around 2.4 m are the practical sweet spot: tall enough to get above furniture, light enough to carry room to room. Avoid flimsy 1.5 m stands that wobble when a flash is mounted.
- Modifiers. A white shoot-through umbrella or a small softbox (around 60 x 90 cm) softens the flash and spreads it across a ceiling. A bare flash bounced off a pale wall works, but a modifier gives you more control over spill and shadow softness.
A kit along these lines fits in a single shoulder bag or small roller case and can be set up in a room in under five minutes once you are practised.
Continuous LED Panels and Their Limits
LED panels are easier to learn on because you see the light as you place it. That convenience comes with trade-offs.
For video walkthroughs, panels earn their place because they provide continuous light that a camera can expose for. If you want a deeper look at how each type performs in practice, our guide to the best lighting for interior photography covers the gear in more detail.
A Realistic Budget
A two-flash starter kit with stands, modifiers, triggers and batteries typically costs somewhere between £400 and £800 depending on brand and whether you buy new or used. A single decent flash alone runs from around £80 to £250; stands are £25-£60 each; a trigger set is £40-£120; and a softbox or umbrella is £20-£60. That is before you factor in a tripod, which is essential for blending exposures and is covered in the shooting section below.
What You Do Not Need
Most beginners overbuy. You do not need studio strobes, heavy C-stands, gels, or a light meter for residential property work. A light meter is useful for commercial interiors, but for most homes your camera's histogram and a test shot are enough. Spend the money on a second identical flash instead of a more powerful single unit: two matched lights give you more control than one strong one.
How to Light a Room for Real Estate Photography
The short answer: light the room, not the camera. Aim your flash at a ceiling or a pale wall and let the bounce fill the space.
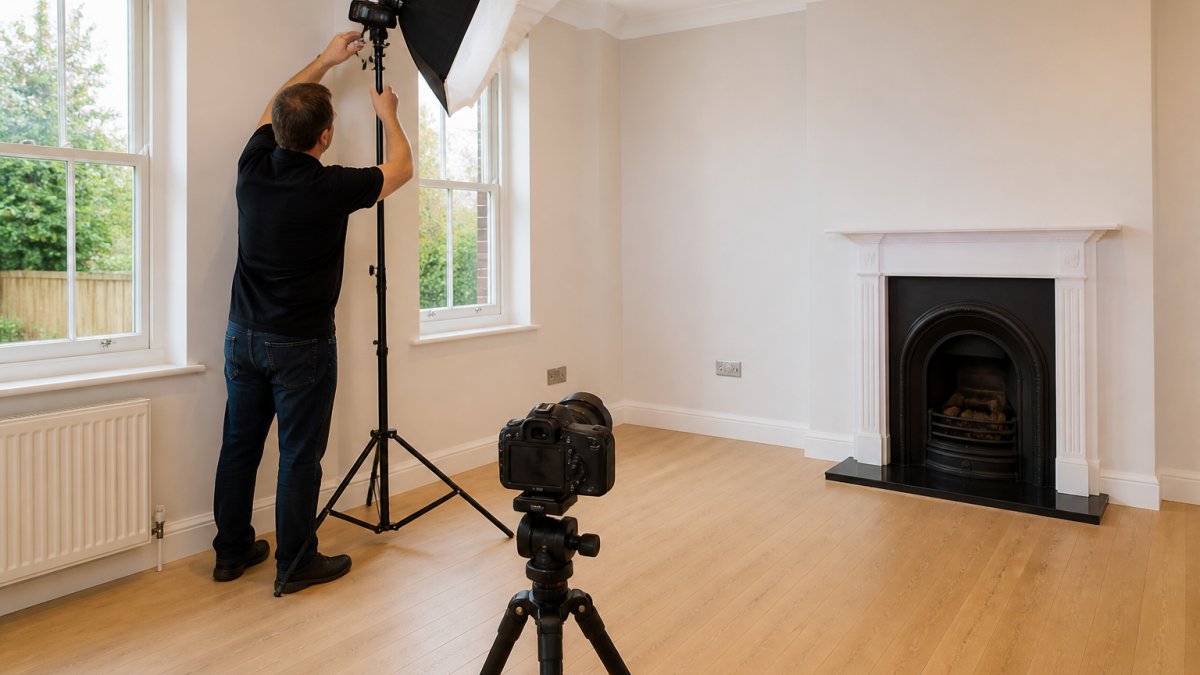
A simple routine works for most rooms:
- Turn on every existing light and open curtains to maximise what's already there.
- Place one flash behind the camera, aimed up and slightly back to bounce off the ceiling.
- Add a second flash in a dark corner, aimed at the nearest wall, to lift shadows.
DIY shooters often lose more shots to small errors than to weak gear. Our rundown of common DIY property photography mistakes is worth reading before you shoot your first room.
Natural Light vs Flash for Property Photography
Natural light produces the most believable images when it cooperates. A bright, overcast day gives soft, even light that flatters most rooms with no equipment at all.
Flash gives you consistency. You can shoot the same room at 4pm on a winter afternoon and still produce bright, balanced images.
The trade-off is time. A purely natural-light shoot moves at the weather's pace; a flash-assisted shoot runs to your schedule, which matters when a listing goes live on a fixed date.
Finding the Best Flash for Real Estate Photography
The best flash for real estate photography is a battery-powered unit with adjustable power, a fast recycle time and a built-in radio trigger system, because those three features let you place light anywhere in a room and fire it reliably. Brand matters less than consistency: buy two or three identical units so they behave the same way and share batteries.
Which? guidance on choosing and using cameras and equipment
Speedlight vs Compact Strobe: Which Suits Property Work?
Most property photographers choose between two types of flash:
- Speedlights (hot-shoe flashes). Small, light, battery-powered and cheap enough to buy two or three. A typical speedlight has a guide number of around 36-60 and runs on four AA cells. The trade-off is slower recycle at full power and less consistent output across a long shoot.
- Compact battery strobes. Larger and more expensive, but with faster recycle times, higher guide numbers (often 60-80+) and lithium battery packs that last a full property. They are heavier to carry and overkill for a single-room shoot, but they suit photographers shooting several properties a week.
For a one-off sale or a landlord shooting a single let, a pair of speedlights is the sensible choice. For a working photographer covering multiple properties, a compact strobe system pays for itself in time saved.
Reading the Specs That Actually Matter
| Feature | Why It Matters | What to Avoid |
|---|---|---|
| Adjustable power | Lets you fine-tune fill light per room; look for at least 5 stops of adjustment | Fixed-output units |
| Recycle time | Keeps the shoot moving; aim for under 3 seconds at half power | Slow units that stall the shoot |
| Radio trigger | Fires lights you cannot see from the camera; 2.4 GHz systems are more reliable than optical | Optical-only triggering |
| Battery life | Covers a full property in one charge; lithium packs typically outlast AA cells | Units needing mains power |
| Daylight balance | Matches window light without colour casts; around 5600 K | Strong colour tints |
| Guide number | Indicates power; a GN of 36+ is workable for bounced light in most rooms | Very low GN units that struggle to fill a room |
How Guide Numbers Translate to Real Rooms
A flash with a guide number of 36 metres at ISO 100 gives you roughly f/4 at 9 metres, or f/8 at 4.5 metres, with direct flash. Bounced off a ceiling, expect to lose one to two stops depending on the ceiling height and colour. That is why a GN 36 flash is adequate for a typical room but marginal in a large, dark space with high ceilings. If you regularly shoot open-plan living areas or period properties with tall ceilings, a higher guide number or a second flash in the room solves the problem more reliably than pushing ISO.
Buying Used: What to Check
Used speedlights are plentiful and often good value, but test before you buy. Fire the unit at full power and at minimum power, time the recycle, and check that the zoom head moves freely. Look for scorch marks around the flash tube and ask how many shots the unit has fired if the seller knows. A flash that has been used heavily for event work may be near the end of its capacitor life.
Buying your own kit is only worth it if you shoot regularly. For a one-off sale, the cost of gear, stands and the learning time rarely stacks up against hiring someone who already owns it and knows how to place it.
Red Flags vs Cosmetic Issues: What Lighting Cannot Fix
Lighting can rescue a dim hallway or a gloomy bedroom. It cannot rescue a cracked ceiling, a damp patch or a blown window seal, and pretending otherwise wastes everyone's time.
advice on damp and condensation in homes
The honest split looks like this:
- Cosmetic: dull paint, dark corners, small windows, dated furniture. Lighting and styling fix these.
- Red flag: subsidence cracks, mould growth, water staining, failed window seals. These need a building survey, not a softbox.
If you're unsure whether professional photos can rescue a badly lit property or whether the problem runs deeper, our article on whether professional photos can fix bad lighting sets out the limits clearly.
Book a Photographer Who Brings the Right Kit
Here's the part most guides skip. Buying the gear is the easy half; knowing where to put it, how to balance it against each window and how to keep a shoot moving is the hard half.
Property Home Photos works directly with photographer Mark Henry Rood and provides a punctual, photographer-led shoot that respects owners and guests. You can see what a professional shoot includes on our property photography page. You can request a tailored quote for your home, let or venue.
Frequently Asked Questions
What lighting equipment do you need for real estate photography?
A practical setup includes two to three speedlights or strobes, light stands tall enough to reach ceiling height, wireless triggers, and a tripod for bracketing exposures. Modifiers such as shoot-through umbrellas or small softboxes help soften the light. A torch or LED panel is useful for filling alcoves and cupboards. This lighting equipment covers most interiors, from small flats to open-plan living spaces, without overcomplicating the shoot.
Are speedlights or continuous lights better for real estate photography?
Speedlights usually win for interiors. They output far more light than continuous LED panels, which lets you balance a bright window with a darker room and keep colours accurate. Continuous lights are easier to learn on and useful for video walkthroughs, but they struggle in large or south-facing rooms. Many photographers carry a small LED panel for detail shots and rely on flash for the main room images.
Can professional lighting equipment fix a dark room in property photos?
Lighting can lift a dim room considerably, but it cannot fix a room with no windows, heavy damp staining or serious structural problems. Flash and bracketing will brighten shadows and balance a bright window, yet buyers still expect photos to reflect the property honestly. If a room is genuinely dark, the listing should say so. Good lighting equipment supports accurate images rather than disguising flaws.
Do real estate photographers use off-camera flash?
Yes, off-camera flash is standard for interior work. Placing a speedlight on a stand in a corner and firing it wirelessly lets you light a room evenly without a harsh burst straight from the camera. Photographers typically take several frames, moving the flash between positions, then blend them. This approach keeps window views intact and avoids the flat, shadowless look that on-camera flash produces.
The gap between a listing that earns enquiries and one that gets scrolled past usually comes down to light and how it's handled. Property Home Photos brings the equipment, the eye and a photographer-led shoot planned around your deadlines. Get started with Property Home Photos and give your property imagery that removes doubt and builds interest from the first click.