 how-to
Best Lighting for Interior Photography: A Practical Guide
Table of Contents
- Natural Light Interior Photography Tips for Bright, Balanced Rooms
- Interior Photography Lighting Equipment: What You Actually Need
- Balancing Ambient and Flash Light in a Single Exposure
- Can Professional Photos Fix Bad Lighting in a Property?
- Managing Shadows, Highlights and Colour Temperature
- Lighting for Small or Cramped Spaces: Budget-Friendly DIY Modifiers
- Choosing the Right Lighting Setup for Your Property
- Frequently Asked Questions
Last Updated: September 21, 2026
Natural Light Interior Photography Tips for Bright, Balanced Rooms
Natural light is the foundation of the best lighting for interior photography, and learning to shape it costs nothing but time. According to guidance from the Royal Photographic Society, understanding how light falls through a window is the single most useful skill a property photographer can develop.
Working with Window Light and Exposure
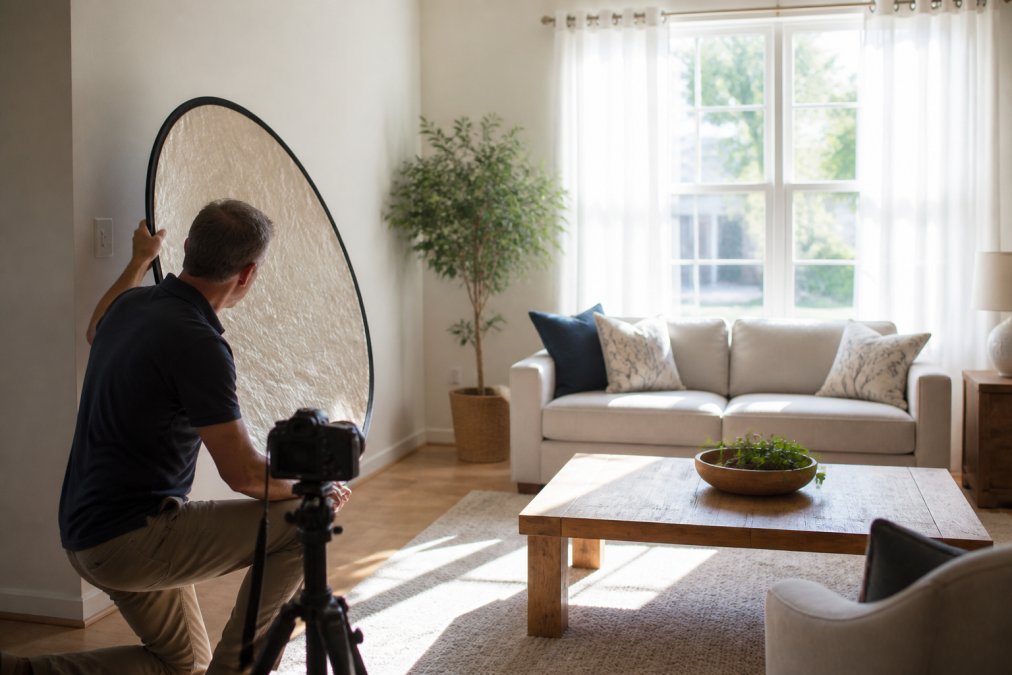
Shoot when the light is softest: early morning or late afternoon, avoiding harsh midday sun. Expose for the window highlights and let shadow fill come from a reflector or a second, dimmer source.
Diffusion Techniques and Modifiers for Harsh Sunlight
Harsh sunlight creates hard-edged shadows and blown highlights. Diffusion softens that light into something closer to an overcast day.
- Sheer curtains and voiles: the cheapest diffuser in any home
- A Westcott Scrim Jim Cine diffusion frame for large windows
- Frosted window film for permanent softening on south-facing glass
- A white bedsheet taped across a frame for a quick DIY option
Interior Photography Lighting Equipment: What You Actually Need
You need far less kit than most guides suggest. A reliable strobe or LED panel, a stand, a modifier and a reflector cover the vast majority of residential interiors; everything beyond that is a specialist tool for a specific problem.
| Equipment | Typical Starting Price | Best For | Main Drawback |
|---|---|---|---|
| Profoto D1 Air Monolight | £1,200 | Large interiors, high power | High investment cost |
| Godox AD600 Pro Witstro | £650 | Portable residential shoots | Heavier than LED options |
| Neewer 660 LED Panel | £85 | Beginners, supplementing daylight | Lower light output |
| Aputure Amaran 200d | £280 | Constant-light shooters | Requires mains power |
| Lastolite TriGrip Reflector | £55 | Filling dark corners | Needs a stand or assistant |
Strobe Lighting and Monolights for Interiors
Strobe lighting gives you power and control daylight alone cannot match. A monolight delivers consistent colour temperature across its power range, which matters when blending flash with window light across a whole property.
Continuous Lighting Solutions and LED Panels
Continuous light lets you see exactly what you are getting before you press the shutter. An LED panel, with adjustable colour temperature from 3200K to 5600K, is a sensible entry point for supplementing natural light on a budget.
Balancing Ambient and Flash Light in a Single Exposure
Balancing ambient and flash separates competent interior photographs from flat ones. The goal is a single exposure where window light and artificial light read as one continuous source, with no visible seam.
A Workable Four-Step Workflow
- Set the composition and aperture first. Choose the aperture that gives you the depth of field the room needs, often f/8 to f/11 for a full room where front-to-back sharpness matters, wider for detail shots.
- Set ISO to your camera's base or first native step (commonly ISO 100 or 200) to keep noise down, since interiors often need shadow recovery later.
- Dial in ambient with shutter speed. Slow the shutter until the window light and any existing room light sit roughly one to two stops below where you want them in the final frame. This is your 'ambient anchor'.
- Add flash and adjust power, not camera settings. Raise flash power until the shadow areas fill to match the ambient anchor. If the flash is too strong, reduce power rather than stopping down the aperture, which would also darken the ambient.
Ratios, Not Guesswork
A useful rule of thumb: aim for flash roughly equal to or one stop under the ambient light in the brightest part of the room. Flash that overpowers ambient by two stops or more produces the tell-tale 'flash-lit' look, flat walls, hard shadow edges behind furniture, and a room that reads as artificial.
- Ambient-dominant (flash 1-2 stops under): most natural-looking, best for lifestyle-led listings
- Balanced (flash equal to ambient): even coverage, good for larger rooms with dark corners
- Flash-dominant (flash 1+ stops over): only for problem rooms where ambient is unusable
When to Blend Exposures Instead
If a room has genuinely extreme dynamic range, a bright bay window against a dark hallway, for example, no single exposure will hold both. Shoot two frames, one exposed for the window and one for the interior, then blend them in post. This is standard practice in architectural photography and often faster than fighting the light on location. Keep the camera locked on a tripod so the exposures align cleanly.
- Tripod is non-negotiable for blending
- Shoot the ambient frame first, then add flash for the interior frame
- Match white balance across both frames before blending
- Avoid moving furniture or people between frames
Can Professional Photos Fix Bad Lighting in a Property?
Professional photos can improve bad lighting, but they cannot invent light that was never there. Editing recovers shadow detail and corrects colour, yet a room with no window and one dim bulb will still look like a room with no window and one dim bulb.
Managing Shadows, Highlights and Colour Temperature
Colour temperature management is where most interior shoots are won or lost, and it is the angle most guides skip. Every light source has a colour temperature, measured in Kelvin, and mixing them without correction creates casts that read as unprofessional, even to viewers who could not name what is wrong.
The Three Ways to Fix a Mixed-Light Room
- Correct at the source. Gel your flash or strobe to match the dominant ambient source. A full CTO (colour temperature orange) gel converts daylight-balanced flash to roughly tungsten, and a half CTO splits the difference. This is the cleanest fix because it solves the problem before the light ever reaches the sensor.
- Set LED panels to match the room, not your preference. If the room's practical bulbs are warm, set your LED panel warm. A panel left at 5600K in a tungsten-lit room will read as a cold, blue patch against a warm wall.
- Correct in post, but only as a last resort. Post correction works well for a single dominant cast. It works poorly when two casts sit in the same frame, because correcting one throws the other further off.
A Practical White Balance Workflow
- Set your camera's white balance manually rather than relying on auto, auto white balance will drift between frames as you move around the room, making batch editing a nightmare.
- Shoot a grey card or colour checker frame at the start of each room, under the lighting you intend to use. This gives you a reference point for batch correction across every frame from that setup.
- Match your flash or LED panel to the dominant ambient source before you shoot, not after.
- Where possible, avoid framing daylight and tungsten in the same shot. Recompose, or turn off the practical bulbs and light the room with your own colour-matched sources.
Shadow Fill Without Flattening the Room
Shadow fill matters as much as colour. Bounce light into dark corners with a reflector rather than raising overall exposure, which flattens the room and kills the depth that makes a space feel real.
- Place the reflector opposite the primary light source, angled to catch and redirect it into the shadow side of the room
- Keep the reflector out of frame, a visible reflector edge is an instant giveaway
- Use black card or fabric as a flag to stop light spilling onto walls you want to keep dark, which preserves contrast and depth
- Check the histogram after each setup change; a room that looks balanced on the camera screen can still be clipping highlights in the window
Lighting for Small or Cramped Spaces: Budget-Friendly DIY Modifiers
Safety matters too. Trailing mains cables across a client's floor is a genuine hazard, and battery-powered lights remove the risk entirely. Check that any stand is weighted and clear of walkways before you shoot.
Choosing the Right Lighting Setup for Your Property
Match the setup to the property, not your favourite gear. A bright, south-facing living room needs almost nothing beyond a reflector; a basement flat with one small window needs a portable strobe and careful colour matching.
| Property Type | Recommended Setup | Why |
|---|---|---|
| Bright, open-plan home | Natural light plus reflector | Minimal kit, maximum authenticity |
| Period property, small windows | Portable strobe plus diffusion | Adds controlled light without clutter |
| Holiday let or pub interior | Continuous LED panels | Captures atmosphere and warmth |
| Commercial or retail space | Multiple strobes, colour-matched | Even coverage across large areas |
Frequently Asked Questions
What kind of lighting is best for interior photography?
There is no single best type, but most professional interior photography combines natural window light with artificial fill. Natural light gives rooms a warm, spacious feel, while strobes or LED panels lift shadows and balance exposure. For dark rooms or evening shoots, battery-powered strobes or continuous LED panels provide consistent, controllable light. The right choice depends on room size, window position and whether you need portability.
Is natural light always better for interior photography?
Natural light is often preferred because it looks authentic and reveals a room's true character, but it is not always practical. North-facing rooms or properties with small windows can be too dark, and harsh midday sun creates blown highlights. In these cases, strobe lighting or continuous light paired with diffusion and bounce light produces more even results. Many photographers blend ambient light with a flash to keep the natural feel while fixing exposure problems.
Can professional photos fix bad lighting in a property?
Professional photos can significantly improve how a property looks, but they cannot invent light that is not there. A skilled photographer uses strobes, reflectors and diffusion to balance ambient light, fill shadows and control colour temperature. Post-production tools can correct white balance and exposure across a set. However, if a room has no windows and poor artificial light, the results will still be limited without additional lighting equipment on site.
What equipment is essential for lighting interior spaces?
A practical kit includes at least one battery-powered strobe or a high-output LED panel, a sturdy light stand, and a reflector to bounce light into dark areas. Diffusion fabric or a softbox softens harsh shadows. For window light control, a scrim or diffusion panel helps manage bright exteriors. A colour temperature meter or grey card helps maintain consistent white balance across the shoot.
Getting the lighting wrong costs more than a reshoot. It costs enquiries, viewings, and the momentum of a launch date. Property Home Photos offers a photographer-led service with a satisfaction guarantee, turnaround planned around your sales deadlines, and imagery built to help homes, lets, and venues win enquiries. Request a quote and get imagery that shows your property as it deserves to be seen.