 blog
DIY Property Photography: 7 Common Mistakes to Avoid
Table of Contents
- Why DIY Property Photography Mistakes Cost You Enquiries
- How to Prepare a House for Photography
- Property Photography Lighting Tips That Fix Harsh Shadows
- How to Take Property Photos With a Phone
- Editing Mistakes: Over-Editing, Filters, and Colour Balance
- Professional vs DIY Property Photography: When to Make the Call
- Conclusion
- Frequently Asked Questions
Last Updated: October 21, 2026
Why DIY Property Photography Mistakes Cost You Enquiries
Most sellers treat photos as a tick-box step. That is the first and most expensive mistake in DIY property photography.
The stakes are simple. A buyer scrolling a portal gives each listing a second or two.
Below, we'll show you how to prepare a house for photography, how to take property photos with a phone, and when to stop trying and call in a professional.
How to Prepare a House for Photography
Preparation is where most DIY shoots are won or lost. A tidy, well-lit room photographs far better than an expensive camera in a messy one. Give yourself a full afternoon before the shoot.
Start with the basics:
- Clear every surface of personal items: keys, post, chargers, toiletries
- Hide bins, laundry and pet bowls out of frame
- Straighten cushions, throws and duvet covers
- Open all curtains and blinds fully
- Clean windows inside and out, plus mirrors and glass
- Move bins and wheelie bins away from the front of the house
Small details matter more than you think. A half-open wardrobe door or a towel on the floor pulls the eye away from the room.
Room-by-Room Decluttering Checklist
Use this checklist the day before your shoot. Tick each item off as you go.
- Living room: clear the coffee table, plump cushions, hide cables, fold throws
- Kitchen: clear worktops to a few essentials, hide washing-up, remove fridge magnets
- Bedrooms: make beds tight, hide laundry, clear bedside tables
- Bathrooms: put toothbrushes and bottles away, hang fresh towels, close the toilet lid
- Hallway: clear shoes and coats, remove post from the floor
- Garden: move bins, hide hoses and toys, tidy the patio furniture
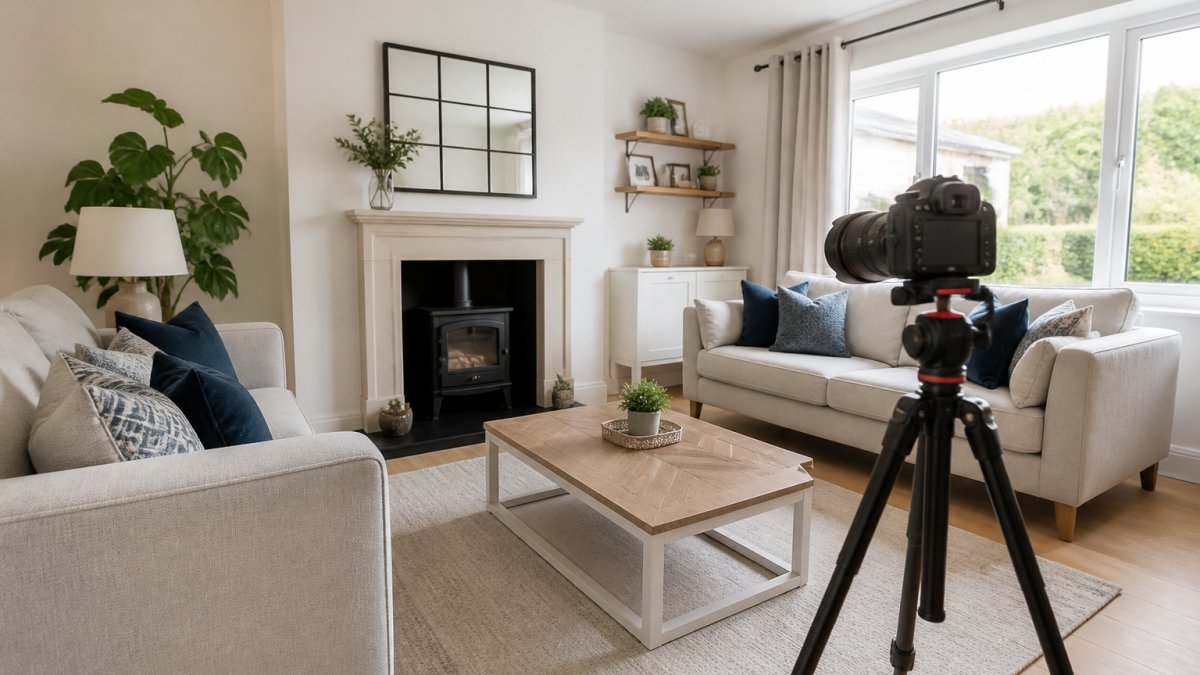
Property Photography Lighting Tips That Fix Harsh Shadows
Lighting is the number one thing that separates amateur shots from professional ones. Natural light is your best tool, and it is free.
Turn off every ceiling light before you shoot. Mixing warm bulbs with cool daylight creates mixed lighting, and the result looks muddy and orange in patches. Open curtains and blinds wide, then shoot when the sun is not streaming directly through a window.
If a room is dark, do not reach for flash. Instead:
- Open every door to let light travel through the house
- Shoot toward the window, not away from it
- Take your time and let your eyes adjust
- Use a tripod or rest your phone on a stable surface
- Bounce light into dark corners with a white wall or a sheet of A3 paper
Why Flash and Automatic Exposure Ruin Interior Shots
Flash and automatic exposure fail for the same reason: they cannot read a room the way your eye does. A bright window tricks the camera into underexposing the room, so the interior turns to shadow. Flash then overexposes whatever is closest.
The fix is to take control of exposure. Tap on a mid-tone area of the room, a wall or a piece of furniture, not the window, to set exposure, then adjust the brightness slider manually.
A Repeatable Lighting Workflow for Every Room
Rather than fixing lighting room by room on instinct, run the same sequence everywhere. It takes about two minutes per room once you are used to it.
- Kill the mix. Switch off ceiling lights, lamps and under-cabinet lights. Mixed colour temperatures are the most common cause of muddy interiors.
- Maximise daylight. Open curtains fully, tilt blinds, and open internal doors along the sightline to the brightest window.
- Check the window. If direct sun is hitting the glass or the floor, wait or shoot from an angle that avoids the hotspot. Direct sun blows out window detail and casts hard shadows.
- Set exposure on a mid-tone. Tap and hold on a wall or floor area, then drag the slider until the room reads correctly and the window is not pure white.
- Bracket the shot. Take one frame at the metered exposure, one a stop brighter and one a stop darker. On a phone, use the slider; on a camera, use exposure compensation.
- Review on the spot. Zoom in on the corners and the window. If the corners are black or the window is a white rectangle, reshoot before you move on.
When to Add Light, and When to Walk Away
Sometimes the light is simply not there. A north-facing room on a winter afternoon, a windowless bathroom or a basement conversion will not photograph well without help. In those cases you have three honest options: shoot at the brightest time of day, add a continuous LED panel bounced off a wall (not pointed at the room), or accept that the room needs a professional.
How to Take Property Photos With a Phone
A modern phone camera is genuinely good enough for a DIY listing, if you use it properly. The mistake is pointing and shooting on full auto and hoping for the best.
Hold the phone level and at chest height. Most rooms look best shot from a corner, capturing two walls and the floor.
Before every shot:
- Wipe the lens with a soft cloth, pocket lint is the most common cause of soft, hazy photos
- Turn on the grid in your camera settings
- Switch off the flash
- Tap to focus on the room, not the window
- Take a wide shot, then a detail shot of a key feature
Shoot more frames than you need. Twenty photos per room is not excessive; you will only keep the best few.
Phone Camera Settings and Composition Basics
Set your phone to its main wide lens, not the ultra-wide. Ultra-wide stretches edges and makes rooms look warped. Keep the grid on and use it to hold vertical lines straight.
For composition, stand in a corner and frame two walls. Leave a little floor at the bottom and ceiling at the top. Do not tilt the phone up or down; that is what causes leaning walls.
A Phone-Specific Setup Checklist
Run this once before you start, then leave the settings alone for the whole shoot.
- Lens: main wide (usually 1x). Avoid 0.5x ultra-wide for room shots.
- Grid: on. Use it to check verticals on door frames and window edges.
- Flash: off. Always.
- HDR: on if available. It helps hold window detail and shadow detail in the same frame.
- Exposure lock: long-press on a mid-tone wall until the lock icon appears, then drag the slider to set brightness.
- Focus: tap the room, not the window. If the phone hunts, lock focus on a wall.
- Format: shoot in the highest quality your phone offers. Do not use a live filter or portrait mode.
- Storage: clear space before you start. A full phone will stop saving without warning.
A Repeatable Phone Workflow, Room by Room
Competitors tend to list mistakes; a workflow is easier to follow. Use the same sequence in every room so you do not miss a shot.
- Prep the room using the decluttering checklist above.
- Set the light, lights off, curtains open, doors open.
- Stand in the doorway and take a wide establishing shot.
- Move to each corner and take a two-wall shot, keeping verticals straight.
- Take one detail shot of the room's best feature.
- Check the frame for clutter, cables, reflections and leaning walls before moving on.
- Repeat in the next room.
This sequence gives you a consistent set that reads well in a portal gallery, rather than a random mix of angles and brightness levels.
Editing Mistakes: Over-Editing, Filters, and Colour Balance
Editing should correct, not transform. The goal is a photo that looks like the property on a good day, not a photo that looks like a different property. Buyers notice, and mismatched listings damage trust fast.
The most common editing mistakes:
- Over-editing: pushing brightness and contrast until walls glow
- Filters: heavy Instagram-style filters that shift the mood
- Oversaturated colours: grass that looks radioactive, skies that look fake
- Over-sharpening: halos around edges and grainy walls
- Wrong colour balance: rooms that look orange or blue
Keep edits subtle. Straighten the verticals, lift the shadows a little, correct the white balance, and stop. If a room looks nothing like it did in person, you have gone too far.
Professional vs DIY Property Photography: When to Make the Call
DIY works well for a straightforward home in good light. It stops working when the property is dark, large, unusual, or when your launch date is tight. That is when the time and stress of doing it yourself outweigh the savings.
Call in a professional when:
- The property is high-value or unusual
- Rooms are dark or awkwardly shaped
- You need photos fast to hit a launch date
- You are marketing a holiday let, pub or commercial space
- Your first DIY set did not generate enquiries
At Property Home Photos, you work directly with photographer Mark Henry Rood. Shoots are punctual and calm, planned around your listing dates, and backed by a satisfaction guarantee.
| Situation | DIY is fine | Go professional |
|---|---|---|
| Bright, standard home | Yes | Optional |
| Dark or awkward rooms | Risky | Recommended |
| Tight launch deadline | Risky | Recommended |
| Holiday let or venue | No | Recommended |
| High-value property | No | Recommended |
Conclusion
Getting the photos right is one of the highest-return jobs in selling or letting a property, and the mistakes above are all fixable.
Property Home Photos offers professional property photography and short promotional video, with turnaround planned around your listing dates, a satisfaction guarantee, and a calm, photographer-led shoot. Request a quote and get imagery that helps your property win more enquiries.
Frequently Asked Questions
What are the most common mistakes in DIY property photography?
The biggest mistakes are poor lighting, using flash, leaving rooms cluttered, and shooting from awkward angles that distort vertical lines. Many people also over-edit photos with filters or oversaturated colours, which makes listings look unrealistic. Automatic exposure often blows out windows or leaves corners dark. Fixing these basics, opening curtains, tidying surfaces, and shooting at eye level with natural light, will noticeably improve your property photos before you consider hiring anyone.
How do I take better photos of my property with a phone?
Use your phone's grid setting to keep vertical lines straight, tap to focus on the brightest part of the room, and adjust exposure manually rather than relying on auto. Shoot during daylight with curtains open and interior lights on for balance. Avoid digital zoom, which softens image quality. For property photography, hold the phone at chest height and step back into corners to capture more of the room. A cheap tripod helps keep shots sharp and level.
Should I use flash when photographing a room?
Avoid flash for most interior property photos. On-camera flash creates harsh shadows, flattens depth, and reflects off windows and glossy surfaces. Natural light combined with a longer exposure or your phone's night mode gives a warmer, more accurate result. If a room is genuinely dark, use a tripod and steady the shot rather than firing flash. Professional property photography relies on balanced ambient light, not direct flash, to show rooms as buyers expect to see them.
When should I hire a professional property photographer?
Hire a professional when the property is high-value, has unusual layouts, or when your listing needs to launch quickly and compete in a busy market. Professional vs DIY property photography often comes down to consistency and turnaround. A photographer brings lighting control, composition experience, and editing discipline that phone shots struggle to match. For holiday lets and hospitality venues where atmosphere drives bookings, professional images usually pay for themselves through stronger enquiry rates.