 how-to
Best Time of Day to Photograph House Exterior
Table of Contents
- Why Timing Decides How a House Exterior Looks
- A Simple Orientation and Time-of-Day Decision Chart
- How to Work Out Sun Direction for House Photography
- Golden Hour Property Photography and the Twilight Alternative
- Overcast Day Exterior Photography: When Cloud Cover Helps
- Season, Latitude and Local Sun-Path Adjustments
- Handling Harsh Light, Deep Shadows and Mixed Lighting
- A Complete Shoot Workflow: How to Prepare a House for Exterior Photos
- Frequently Asked Questions
Last Updated: October 12, 2026
Why Timing Decides How a House Exterior Looks
The best time of day to photograph a house exterior depends on which way the front faces.
This guide from Property Home Photos covers when to shoot each property type, how to work out which way a house faces, and how to handle British weather.
Buyers scroll past dark, murky listing photos without a second thought. According to Rightmove's guidance on property photography, clear, well-lit photos consistently attract more clicks than poorly lit ones.
The 5 timing rules below will help you book the right slot, avoid the worst light, and get exterior shots that sell the property.
A Simple Orientation and Time-of-Day Decision Chart
Match the shoot time to the direction the facade faces, the single most useful rule in exterior property photography. The table below is a decision chart with clock windows rather than vague labels.
| Facade Direction | Best Window (Spring/Autumn) | Best Window (Summer) | Best Window (Winter) | Why It Works |
|---|---|---|---|---|
| East-facing | 07:00-10:00 | 06:00-09:00 | 08:00-11:00 | Sun lights the front elevation as it climbs |
| West-facing | 15:00-18:00 | 17:00-20:00 | 13:00-15:30 | Warm, low light hits the facade as the sun drops |
| South-facing | 10:00-14:00 | 09:00-15:00 | 10:00-13:00 | Even, consistent light for most of the day |
| North-facing | 07:00-09:00 or 16:00-18:00 | 06:00-08:00 or 18:00-20:00 | 09:00-11:00 or 13:00-15:00 | Avoids deep shadow; softest available light |
These windows are a starting point: exact times shift with season, latitude and obstructions. A sun-path app gives the precise window for a specific address and date.
A common mistake is booking every shoot for the same slot, say 10 a.m. Fine for an east-facing house; for a west-facing one it means shooting the shaded side all morning.
What About the Other Three Elevations?
The front elevation is the hero shot, but a listing usually needs the rear and sides too. Once you know the orientation, work out the shooting order:
- Front elevation first. Shoot it in its best window while the light peaks.
- Rear elevation second. The rear faces the opposite direction, so its best light is roughly twelve hours away, often a second visit or split shoot.
- Side elevations last. These catch cross-light for a shorter window and matter least.
- Corner shots. A three-quarter angle showing two elevations is often the strongest image. Shoot it when the more important facade is well lit.
A Worked Example
A semi-detached house with the front door facing east. The front elevation is best between 07:00 and 10:00; the west-facing rear between 15:00 and 18:00. If the agent needs both in one day, plan a morning visit for the front and a late-afternoon visit for the rear, or a single visit on a bright overcast day, when the light is even enough for every elevation.
How to Work Out Sun Direction for House Photography
Sun direction for house photography comes down to one question: which way does the front point?
Finding Orientation and Predicting Facade Sunlight
You do not need specialist kit. Open a maps app, find the property, and check which way the front elevation points against the street. Then picture the sun's path: it rises in the east, moves across the south, and sets in the west. That arc tells you when each facade gets direct light.
- East facade: lit from sunrise until around late morning
- South facade: lit for most of the day
- West facade: lit from early afternoon until sunset
- North facade: rarely gets direct sun
Timing Each Facing: East, West, North and South
East-facing homes are easiest: book an early morning slot for clean, soft light before the sun climbs high.
West-facing homes need the opposite: late afternoon and evening bring warm, directional light.
South-facing homes are forgiving: midday through early afternoon gives even light.
North-facing homes rarely catch direct sun, so shoot early morning, late afternoon, or on an overcast day.
Golden Hour Property Photography and the Twilight Alternative
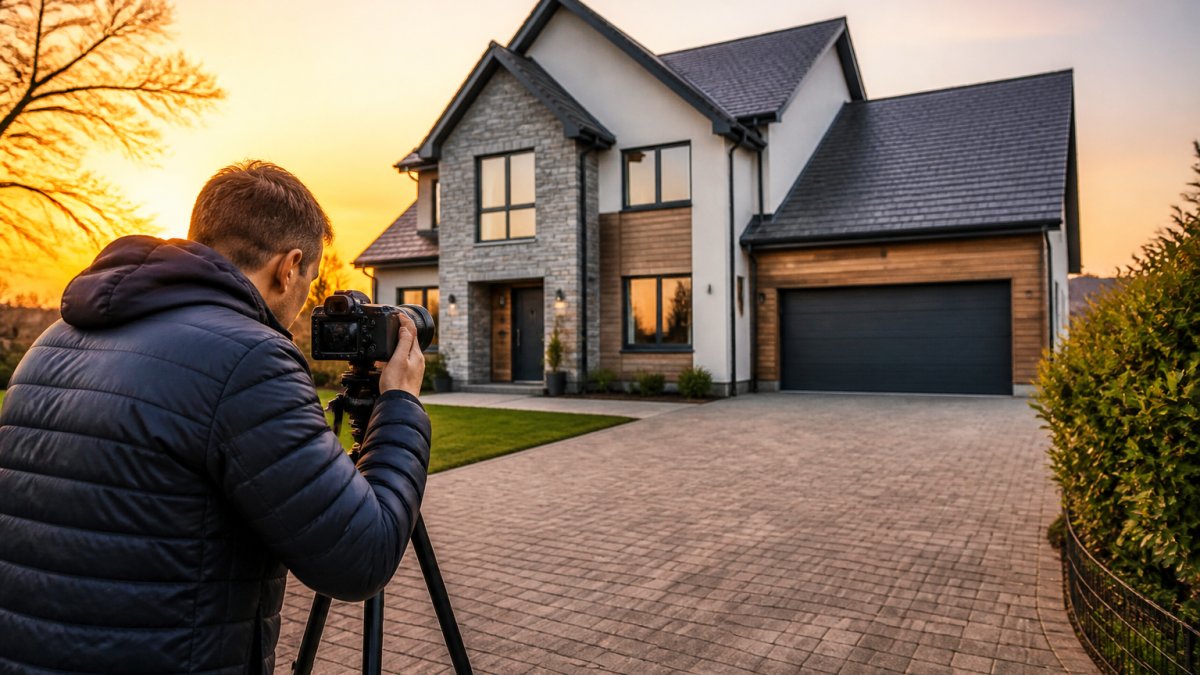
Golden hour property photography captures the warm, low-angle light just after sunrise or before sunset. It flatters brick, stone and render, adding depth flat midday light cannot match.
For west and south-facing homes, golden hour is often the best slot: soft, warm, directional light that gives the building shape. The catch is it lasts only 20 to 30 minutes.
That is where twilight photography comes in: shots taken just after sunset, when the sky still holds colour and interior lights glow through the windows. For hospitality venues, holiday lets and higher-end listings, twilight images can be the most striking in the set.
Overcast Day Exterior Photography: When Cloud Cover Helps
Overcast day exterior photography solves the hardest problem in the business: north-facing homes and harsh midday sun. A layer of cloud turns the sky into one big softbox, giving even light with no blown highlights or deep shadows. For north-facing properties, an overcast day is often best. Not all cloud is equal, though.
- Thin, bright cloud: soft light with some direction. Ideal.
- Heavy, dark cloud: dull and grey. Can make a property look tired.
- Broken cloud: mixed light that changes by the minute. Hard to work with.
Our rule: bright overcast beats harsh sun almost every time, but dark, heavy overcast is worse than waiting for a better day.
Season, Latitude and Local Sun-Path Adjustments
Fixed clock times only work if the sun behaved the same way year-round. Season, latitude and the local skyline all move the goalposts. Here is how to adjust.
How the Sun's Path Changes Through the Year
The sun rises in the east and sets in the west every day, but the arc between those points changes dramatically. In summer it climbs high, so midday light is harsh and overhead. In winter it stays low, so golden hour lasts longer but usable daylight is short. Picture a shallow arc in winter and a steep arc in summer: a shallow arc means low-angle light for more of the day, which flatters facades but stretches shadows from trees and neighbouring buildings further across the property.
Why Latitude Matters
The further north a property sits, the lower the sun stays. Two effects:
- Lower sun angles. Shallower light creates more depth and texture on brick, stone and render, generally a gift for exterior shots.
- Longer shadows. The same low angle means trees, fences and adjacent buildings cast longer shadows across the facade, so check what blocks the light at your planned time.
Local Sun-Path Adjustments
A sun-path app shows exactly where the sun will be at any hour on any date for a specific address. Before a shoot, check:
- Sunrise and sunset times for the date, so you know the limits of usable light.
- The sun's azimuth (compass direction) at your planned time, to confirm it will hit the facade.
- Obstructions. Trees, hills and neighbouring buildings that block the sun at certain times of year, a facade clear in winter may be shaded by a mature tree in summer.
- Cloud cover, not just rain. Bright overcast often beats harsh sun, so a cloudy forecast is not automatically a reason to reschedule.
Practical Seasonal Adjustments
- Winter: book earlier because usable light fades fast. Golden hour lasts longer, but the total window is short, so have the shot list ready.
- Summer: avoid the harsh middle of the day. Early morning and late evening are the sweet spots, and golden hour is longest.
- Spring and autumn: the most forgiving seasons, with moderate sun angles and easier light all day.
- Changeable days: in the UK, a day can swing from sun to heavy cloud and back. Build slack into the schedule so you can wait out a bad patch.
Handling Harsh Light, Deep Shadows and Mixed Lighting
Harsh light, deep shadows and mixed lighting ruin otherwise good exterior shots. Each has a fix.
Harsh midday sun creates hard shadows and blown highlights: shoot earlier or later, or wait for bright cloud.
Mixed lighting, part sun, part shade, or clashing interior and exterior light, is hardest.
- Bracket your exposures to protect highlights and shadows
- Shoot in raw so you can recover detail later
- Use a polarising filter to cut glare on windows and wet surfaces
- Avoid shooting straight into the sun unless you want flare
These problems are predictable: once you know the orientation and forecast, you can plan around them before leaving the office.
A Complete Shoot Workflow: How to Prepare a House for Exterior Photos
Knowing how to prepare a house for exterior photos separates a good shoot from a wasted trip.
Total Time: 60 to 90 minutes on site Difficulty: Beginner to intermediate
What You'll Need
- A camera with a wide lens
- A tripod
- A polarising filter
- A compass or sun-path app
- A shot list
Step 3: Tidy the exterior [Time: 20 minutes] Clear bins, cars, hoses and clutter. Tidy the landscaping.
Step 4: Shoot the front elevation first [Time: 15 minutes] Light changes fast.
Expected Result: A full set of bright, even exterior and interior images that show the property at its best.
This is where a professional service earns its keep.
Timing a property shoot around the sun is fiddly, and one wrong slot can leave photos that undersell the house. You get a photographer-led service with a satisfaction guarantee, turnaround planned around your launch date, and images that help homes, lets and venues win more enquiries. Request a quote and get exterior photos that actually sell the property.
Frequently Asked Questions
What is the best time of day to take photos of a house?
It depends on which way the facade faces. East-facing frontages look best in the first two to three hours after sunrise, west-facing ones in the two to three hours before sunset, and south-facing elevations hold even light for most of the day. North-facing homes rarely receive direct sun on the front, so late afternoon or a bright overcast day usually gives the most even result. The best time of day to photograph a house exterior is therefore a timing decision based on orientation, not a single fixed hour.
How does the direction of sunlight affect house exterior photos?
Sun direction controls where shadows fall and how much texture the facade shows. Light hitting the front straight on flattens brickwork and render, while side light rakes across the surface and reveals depth. When the sun sits behind the house, the front falls into shadow and the sky blows out. Checking sun direction for house photography before you book means you can pick a slot where the front elevation is lit the way you want it.
Should you photograph a house on a sunny or overcast day?
Both work, but they suit different properties. Direct sun gives warm colour and strong contrast, which flatters brick, stone and mature landscaping. Overcast day exterior photography produces soft, diffused light with no harsh shadows, which suits white render, pale cladding and homes with dark recesses or porches. A thin layer of cloud with some blue showing through is often the most forgiving option, because it keeps the sky interesting without washing out the facade.
How should you prepare a house exterior for a photoshoot?
Treat the front elevation like a viewing. Clear the driveway and kerb of bins, wheelie bins and cars, mow and edge the lawn, trim hedges away from windows, and remove cobwebs from door surrounds and light fittings. Clean windows inside and out, since smears and reflections show badly in listing photos. Turn on exterior lights and lamps for twilight shots, and put away hoses, toys and garden tools. Small details like a swept path and a tidy porch read as care to buyers and tenants.